Table of contents
Air circuits
You can think of the flow of air just like the flow of electricity. With a pump, you build up pressure, which enters your inflatable. There are two main ways to deflate the inflatable: a) open a valve to the outside atmosphere to let air out, for example with a solenoid valve; b) make the inflatable leaky (for example with another tube that vents to atmosphere) so that it deflates as soon as the pump is turned off. The pump can then again suck in air from the atmosphere to inflate your device.
This process can be seen as a circuit: air from the atmosphere goes into the pump, into your device, exits your device into the atmosphere, and is sucked up again by the pump.
Pneumatic-electronic analogy
In this pneumatic-electronic analogy, the pump is like a battery, the positive pressure that the pump creates is like voltage, and the baseline level of pressure (atmospheric pressure) is like ‘ground’ in an electronics circuit. Very thin air channels are like resistors (think of drinking a milkshake with a big straw or a very thin straw, and the resistance you would feel!). Air volumes are like capacitors: they charge up with pressure and deflate if there’s a drop in pressure. In that sense they can serve as filters or delays. The table below shows a mapping of pneumatic to electronic terms:
| Pneumatic Term | Electrical Term |
|---|---|
| Pressure | Voltage |
| Airflow | Current |
| Pump | Voltage source |
| Air reservoir | Capacitor |
| Flow restrictor | Resistor |
| One-way valve | Diode |
| Ambient atmospheric pressure | Ground |
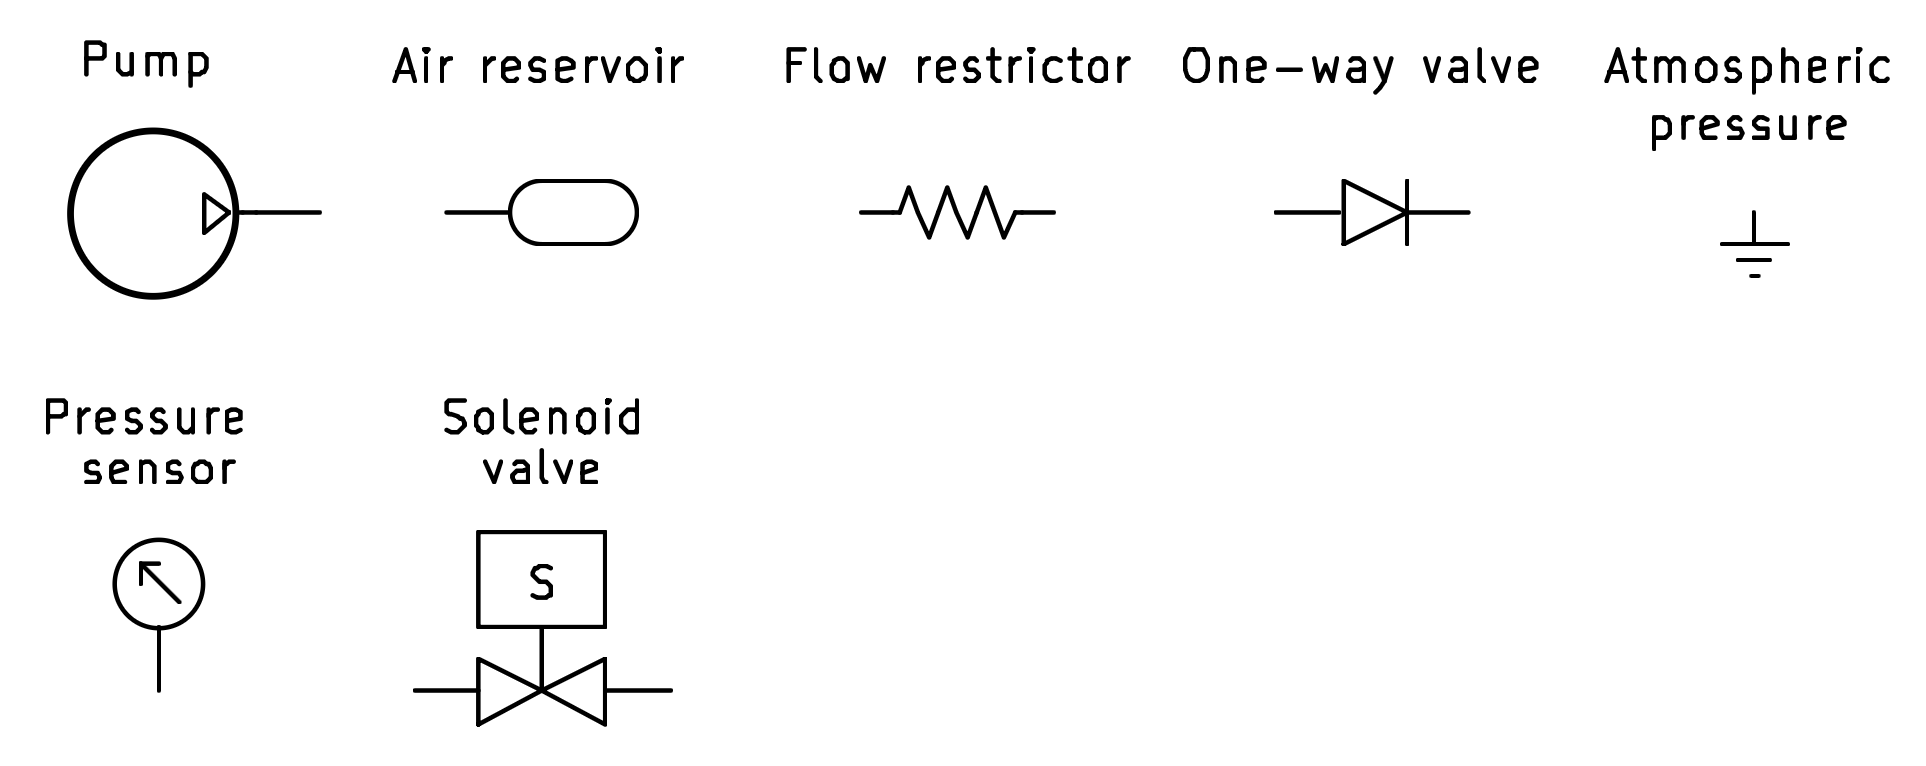
Now that we can think about air flowing in circuits, we can also use schematic notation to draw our pneumatic circuits, just like in electronics. Here are the pneumatic symbols that I use to draw my circuits, but you can find different symbols online if you search for pneumatic and hydraulic symbols. As long as you’re consistent, you’re good to go.
What kind of air circuit do I need?
This depends on the kind of device you’re building. Below is a list of some example configurations you can use.
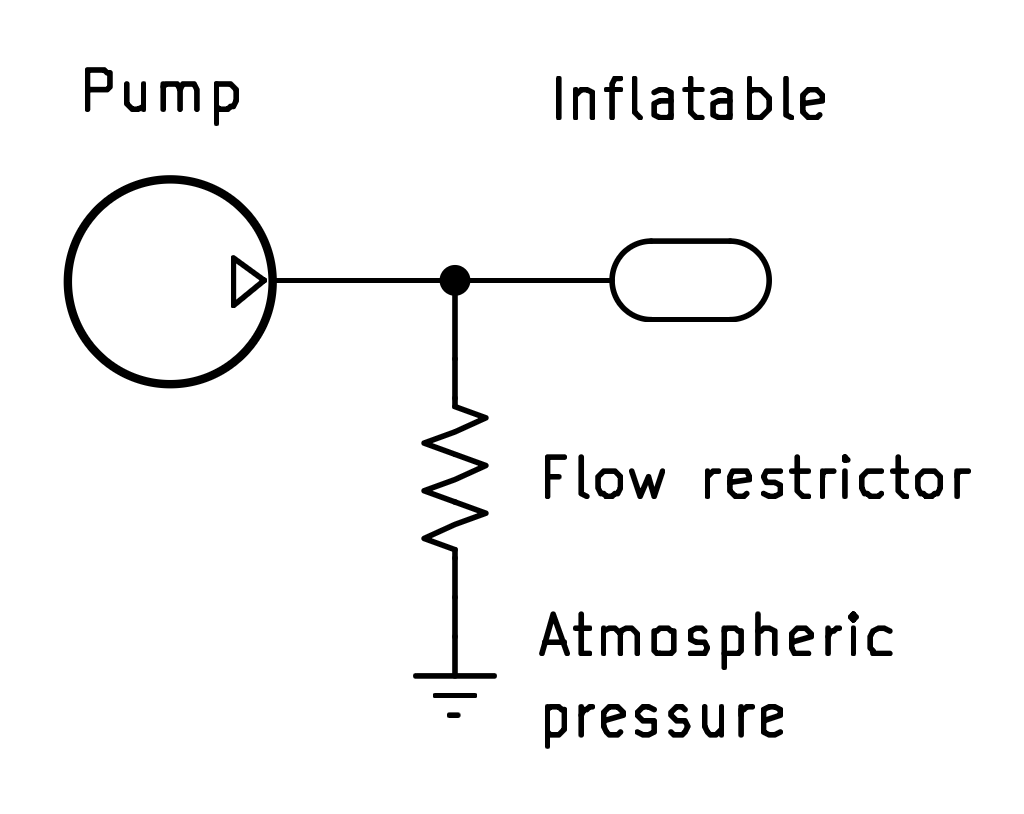
One pump to inflate and deflate an inflatable
This is the simplest circuit you can build. Use a single pump to inflate your inflatable. Add a narrow tube (flow restrictor) that vents air to the atmosphere so your inflatable is always leaking. By activating the pump, the inflatable inflates, and by deactivating the pump, the inflatable (slowly) deflates.
Advantages:
- Only one pump needed.
- Simple to program with an Arduino
Disadvantages
- To keep the inflatable inflated, the pump needs to be turned on continuously
- The inflatable cannot be inflated to the maximum pressure the pump can deliver (probably 1.5 bar)
- When turned on for longer periods, the pump can get warm
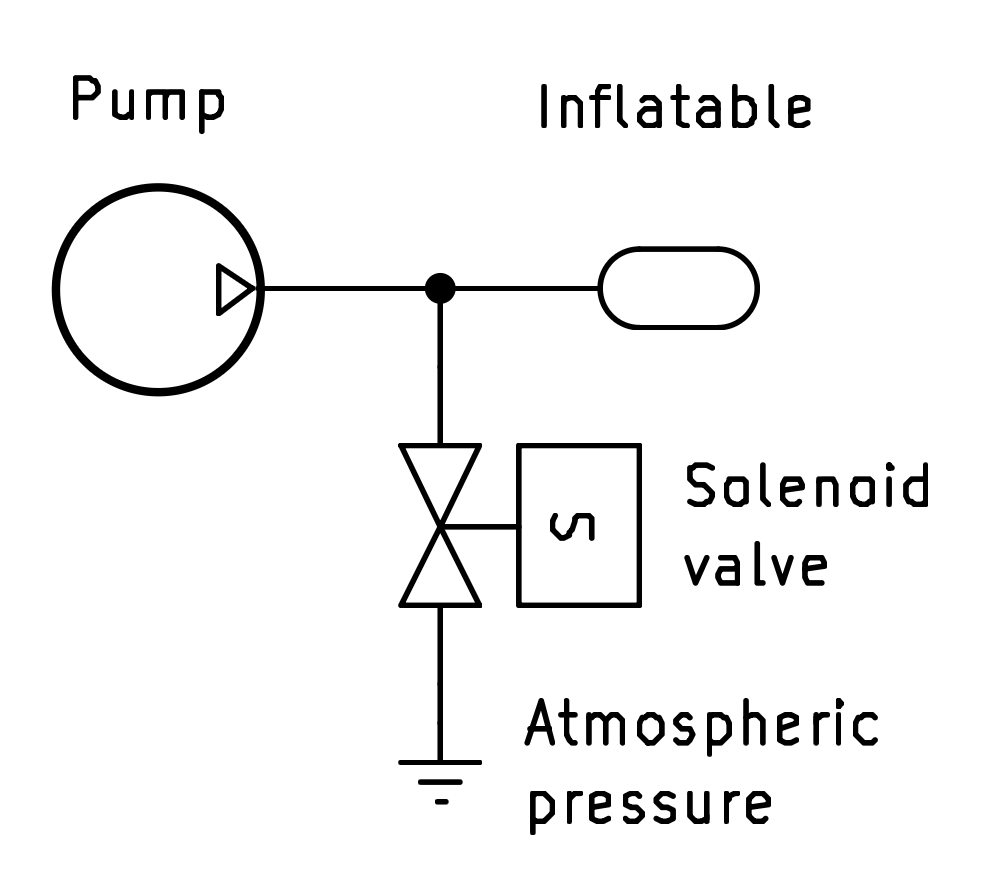
Pump to inflate and solenoid valve to deflate an inflatable
This is a slightly more complicated circuit you can build. The pump can inflate the inflatable the desired amount. The solenoid can deflate the inflatable.
Advantages:
- Pump does not have to be on continuously
- Inflatable can be fully pressurised (probably 1.5 bar)
Disadvantages
- 2 components needed instead of one
- When opened for longer periods, the solenoid can get warm
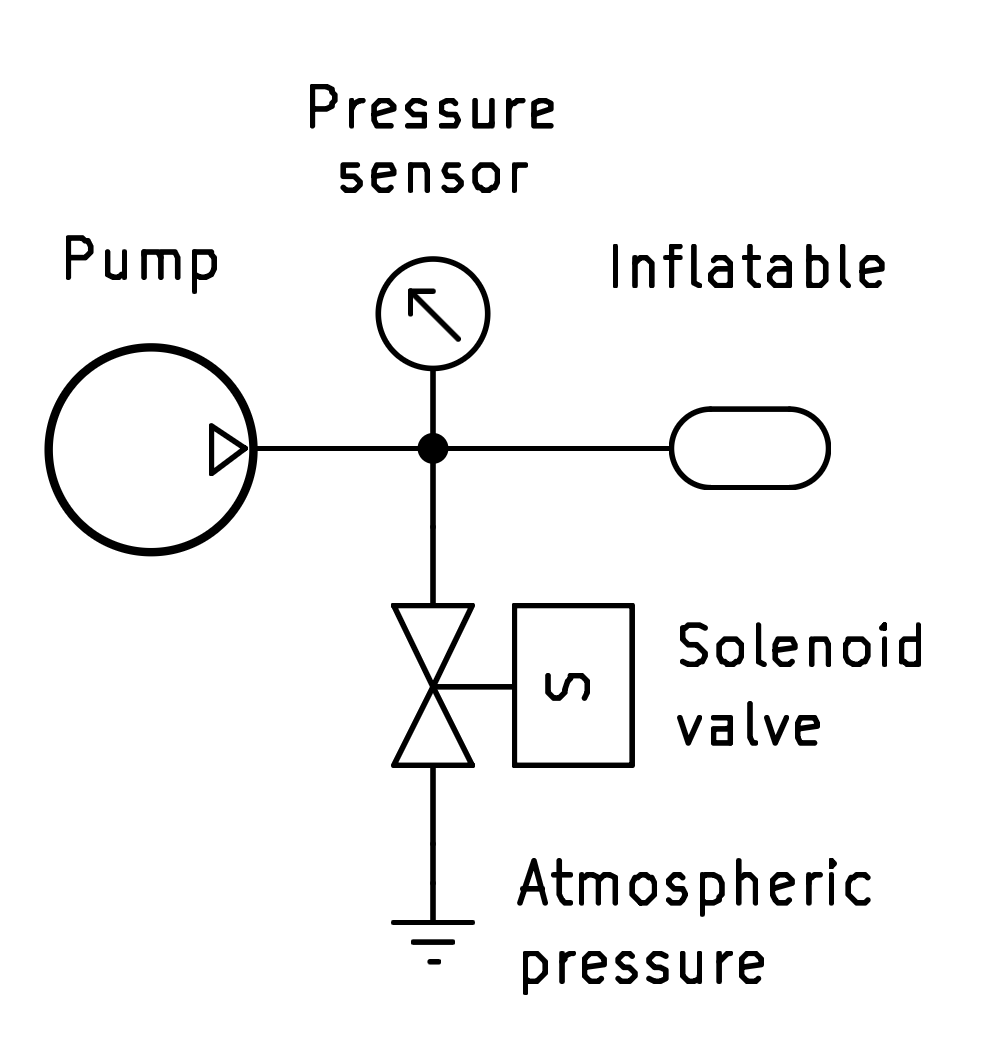
Pump, solenoid and pressure sensor for precise control
If you want to inflate your inflatable to a certain target pressure, you need to measure the pressure with a sensor. The circuit below integrates a pressure sensor.
Advantages:
- More precise control possible
- Inflatable can now also be used as a force sensor (human interaction)
Disadvantages
- More difficult to build
- Sensor might need calibration
- Pump might overshoot target and start to jitter. Include an overshoot offset.