Table of contents
- Inflatables design
- Working with the sealing machines
- Working with silicones and moulds
- Advanced techniques
Inflatables design
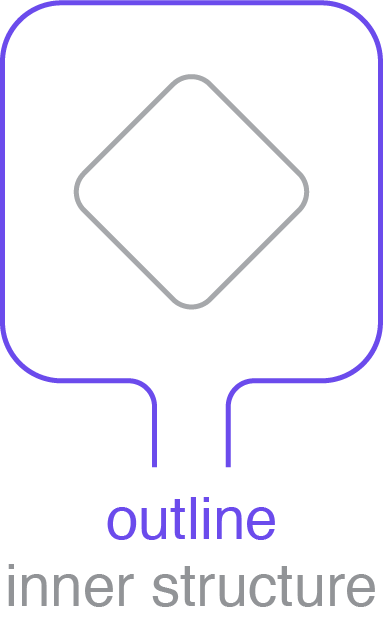
To design inflatables, think in terms of outlines and internal structures. Your device outline should always be closed, unless you want to intentionally introduce a leak into your system.
Working with the sealing machines
You need a formal training to use the sealing machines. After successfully completing the training, you will receive a detailed sealing manual which shows the sealing procedure in depth. If you own a printer (or have access to one) you can also try sealing yourself with just the printing nozzle heated up to around 270 degrees. See this resource for an example (scroll down): link. Sealing is faster than 3D printing, but slower than laser cutting.
Here’s a fabrication video that shows all the steps from sealing on the Sovol to making a finished component: link.
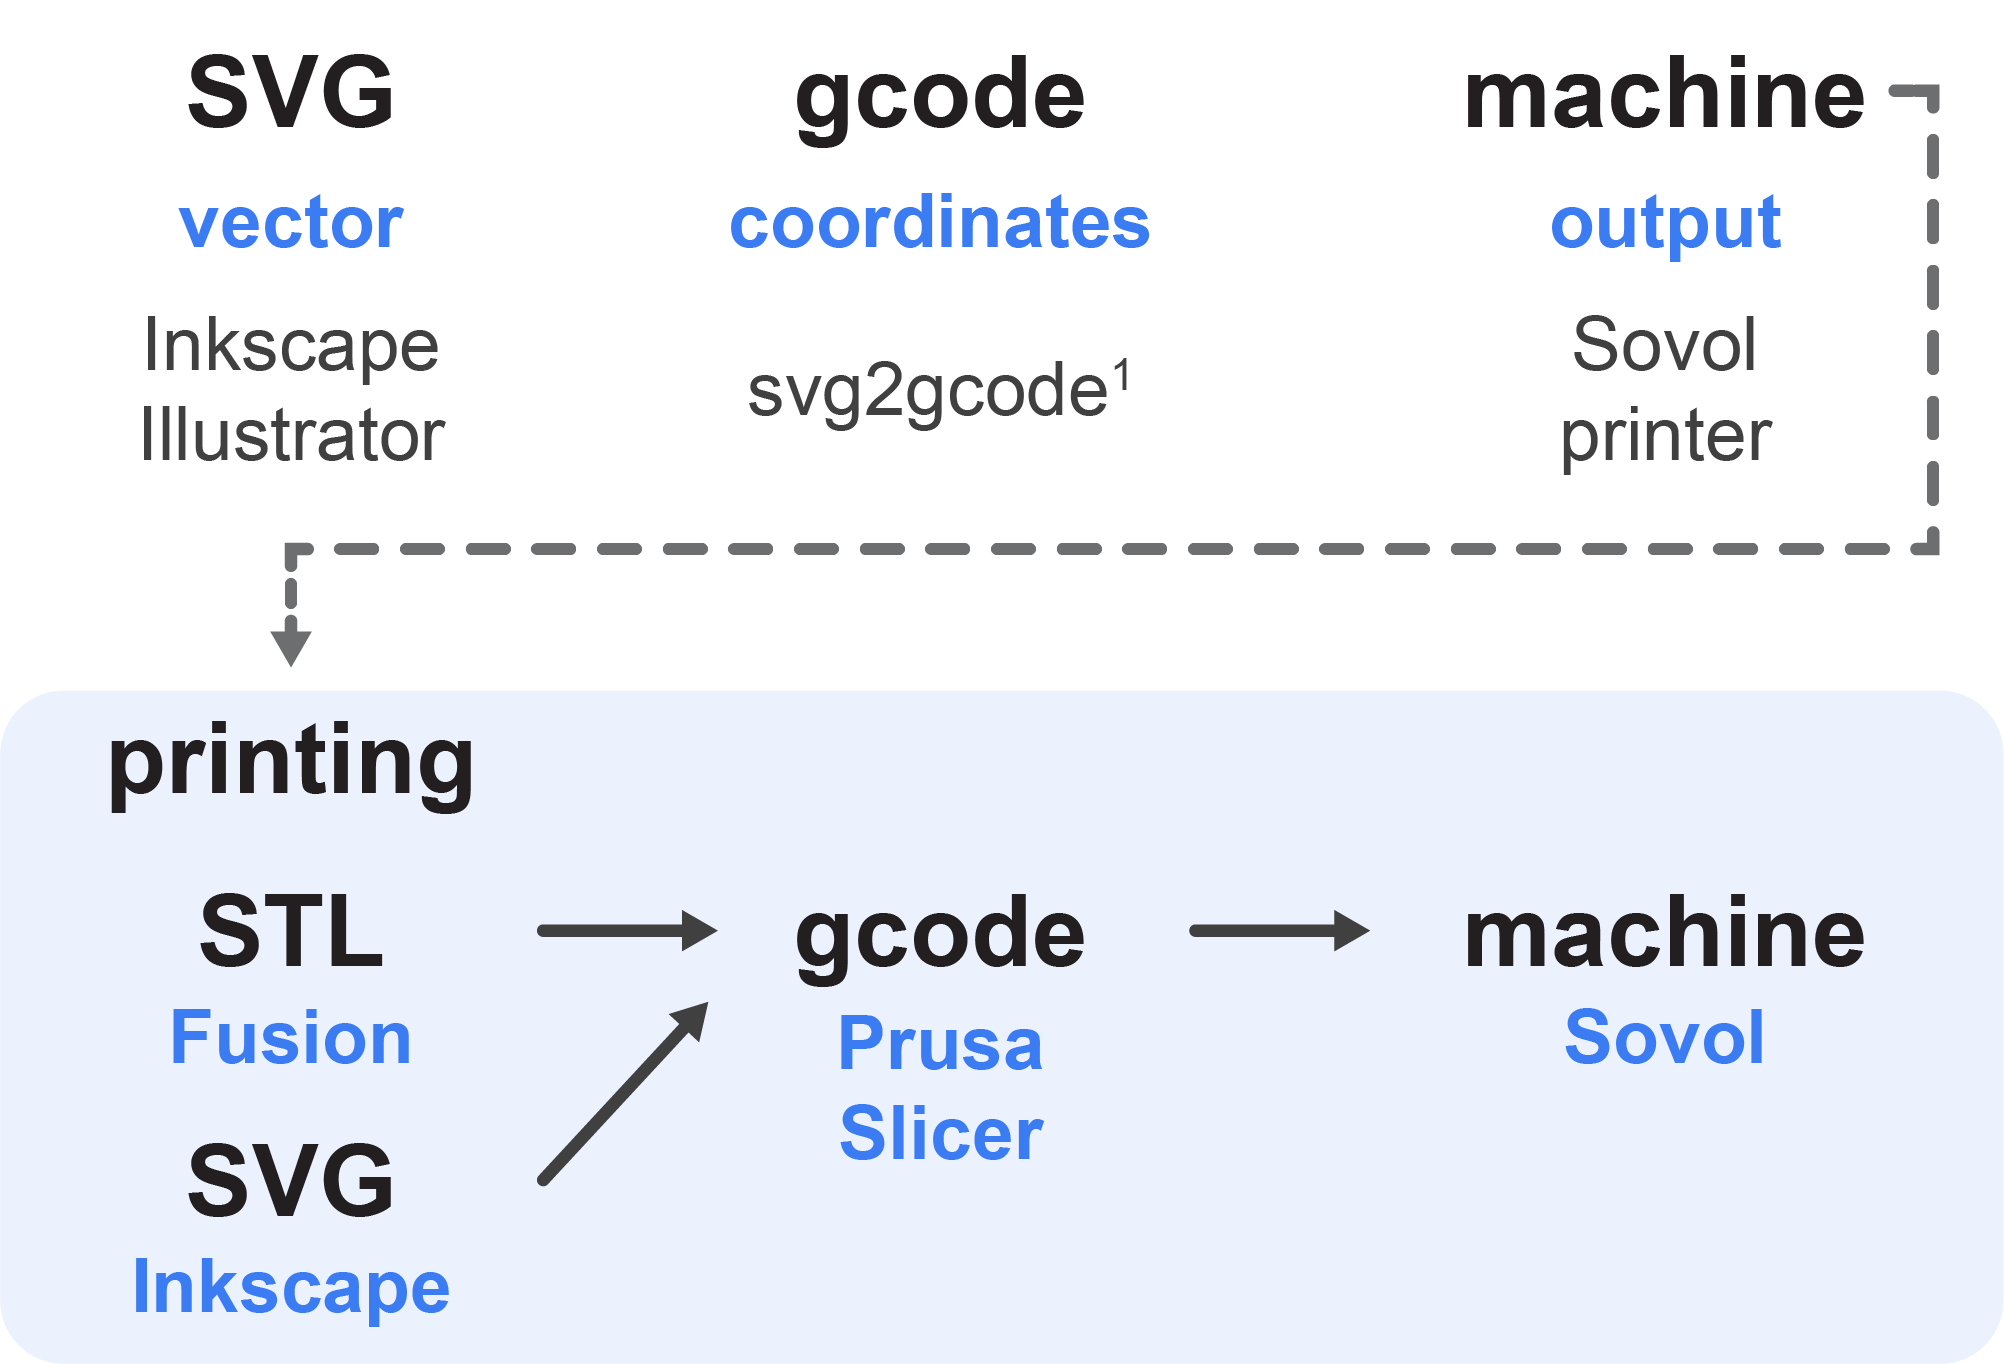
To already become familiar with our sealing process, see a brief overview below:
Sealing:
- Create a vector design in a vector-based illustration application, like Illustrator or the free and open-source Inkscape. Save it as an SVG. Check that your outline consists of one continuous path (all nodes are joined). Otherwise you might get leaks. When creating your design, be careful that you don’t create duplicated lines over each other, or random single nodes on your artboard. A ‘select all’ will highlight any strange leftovers on your artboard.
- Convert your SVG file to gcode using the svg2gcode website: link. The first time you use this website, you will need to update the sealing settings!
- Transfer the gcode to the Sovol printer.
- Prepare the material on the printbed. Put baking paper on top and clamp. Ensure the printbed can move freely without the clamps hitting the frame.
- Start the print.
Optional printing
- Prepare an SVG or STL file for 3D printing on top of the sealed geometry.
- SVG file: drag into PrusaSlicer and give it a height. Put it in the correct location (x,y coordinates). Select the correct printing settings. Export the gcode.
- STL file: drag into PrusaSlicer. Put it in the correct location (x,y coordinates). Select the correct printing settings. Export the gcode.
- Transfer the gcode to the Sovol printer.
- Carefully remove the baking paper without moving the fabric.
- Replace the sealing extruder for the printing extruder. Insert filament.
- Start the print.
The sealing/printing process
1 svg2gcode website: https://sameer.github.io/svg2gcode/
Working with silicones and moulds
You can 3D print moulds and pour silicone into them. We call this silicone casting.
There are a few techniques you can use:
- Design your geometry as one mould with an inner structure. As long as you can pull out the inner mould from the silicone part you cast, you should be good to go. You can find and example of that method here link.
- Design your geometry in two halves/parts. You make two moulds (each for one half), cast each part separately, and then glue together with some additional silicone or silicone glue (FormX). You can find an example here: link and here: link.
- Design your geometry to be glued together in multiple steps. You can make this quite complex. See an example of that here: link.
- Design your geometry with an outer and inner soluble mould. Print the inner mould in soluble filament (PVA or BVOH). Once the silicone has cured, demould as much as you can and put the silicone in water to dissolve the inner. See an example of that here: link.
Advanced techniques
Connecting sealed pouches
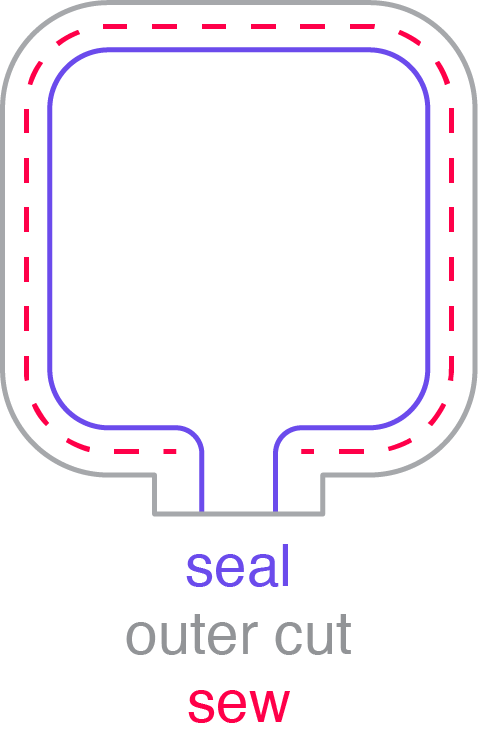
If you leave some material around your outer seal line, you can sew pouches together as long as you don’t stitch through the inflatable areas. Of course you are not limited to sewing around the outer seal. You can sew any fabric area that is not going to be inflated. By using this strategy, you can create multilayer devices.
Sealing larger areas
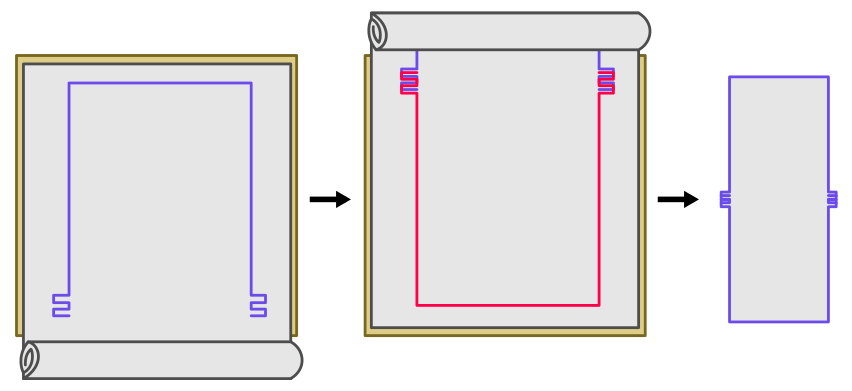
You are normally limited to the 30x30cm printbed of the Sovol for sealing. However, you can get around this by using a larger sheet, sealing up to a certain point, moving the material, and then continuing the rest of the sealing pattern in exactly the right spot. This is tricky to achieve, so it helps to draw some overlapping squiggly lines to ensure airtightness. The diagram below shows you one method of doing this.